Schedules
Introduction
The schedules support both time-based events and astronomical time clock events, allowing commands to be automatically executed according to user-defined programming.
Overview
It is crucial to ensure that the local time and daylight saving time settings are correctly configured. Accurate time settings are key for the precise calculation of astronomical events, allowing commands to be executed at the correct moments relative to sunrise and sunset.
For astronomical events, the local latitude and longitude must be configured. These events can occur at either sunrise or sunset.
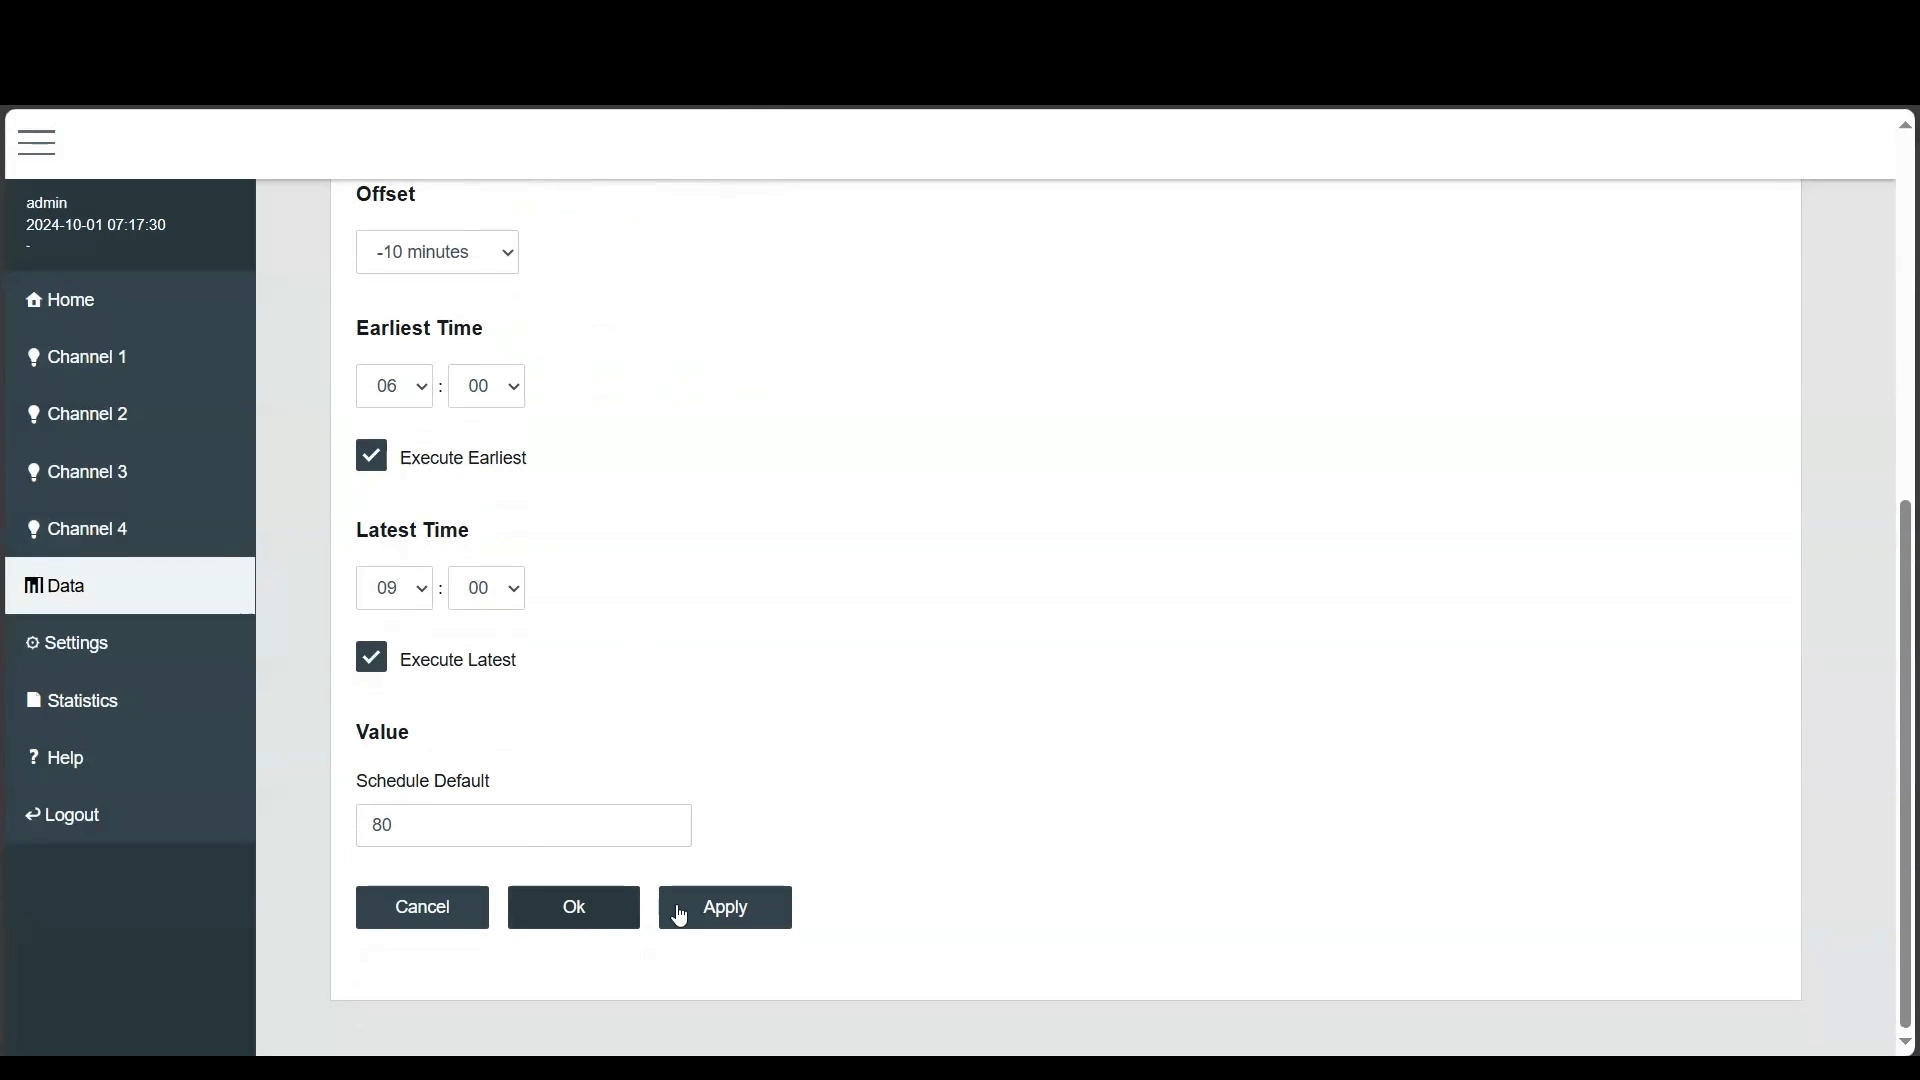
In addition, an offset and boundary time can be set. The offset allows the event to trigger up to 120 minutes before or after the sunrise or sunset time. The boundary defines the earliest and latest times for the astronomical event to take place.
Step by Step Example
Start by logging into the web interface.
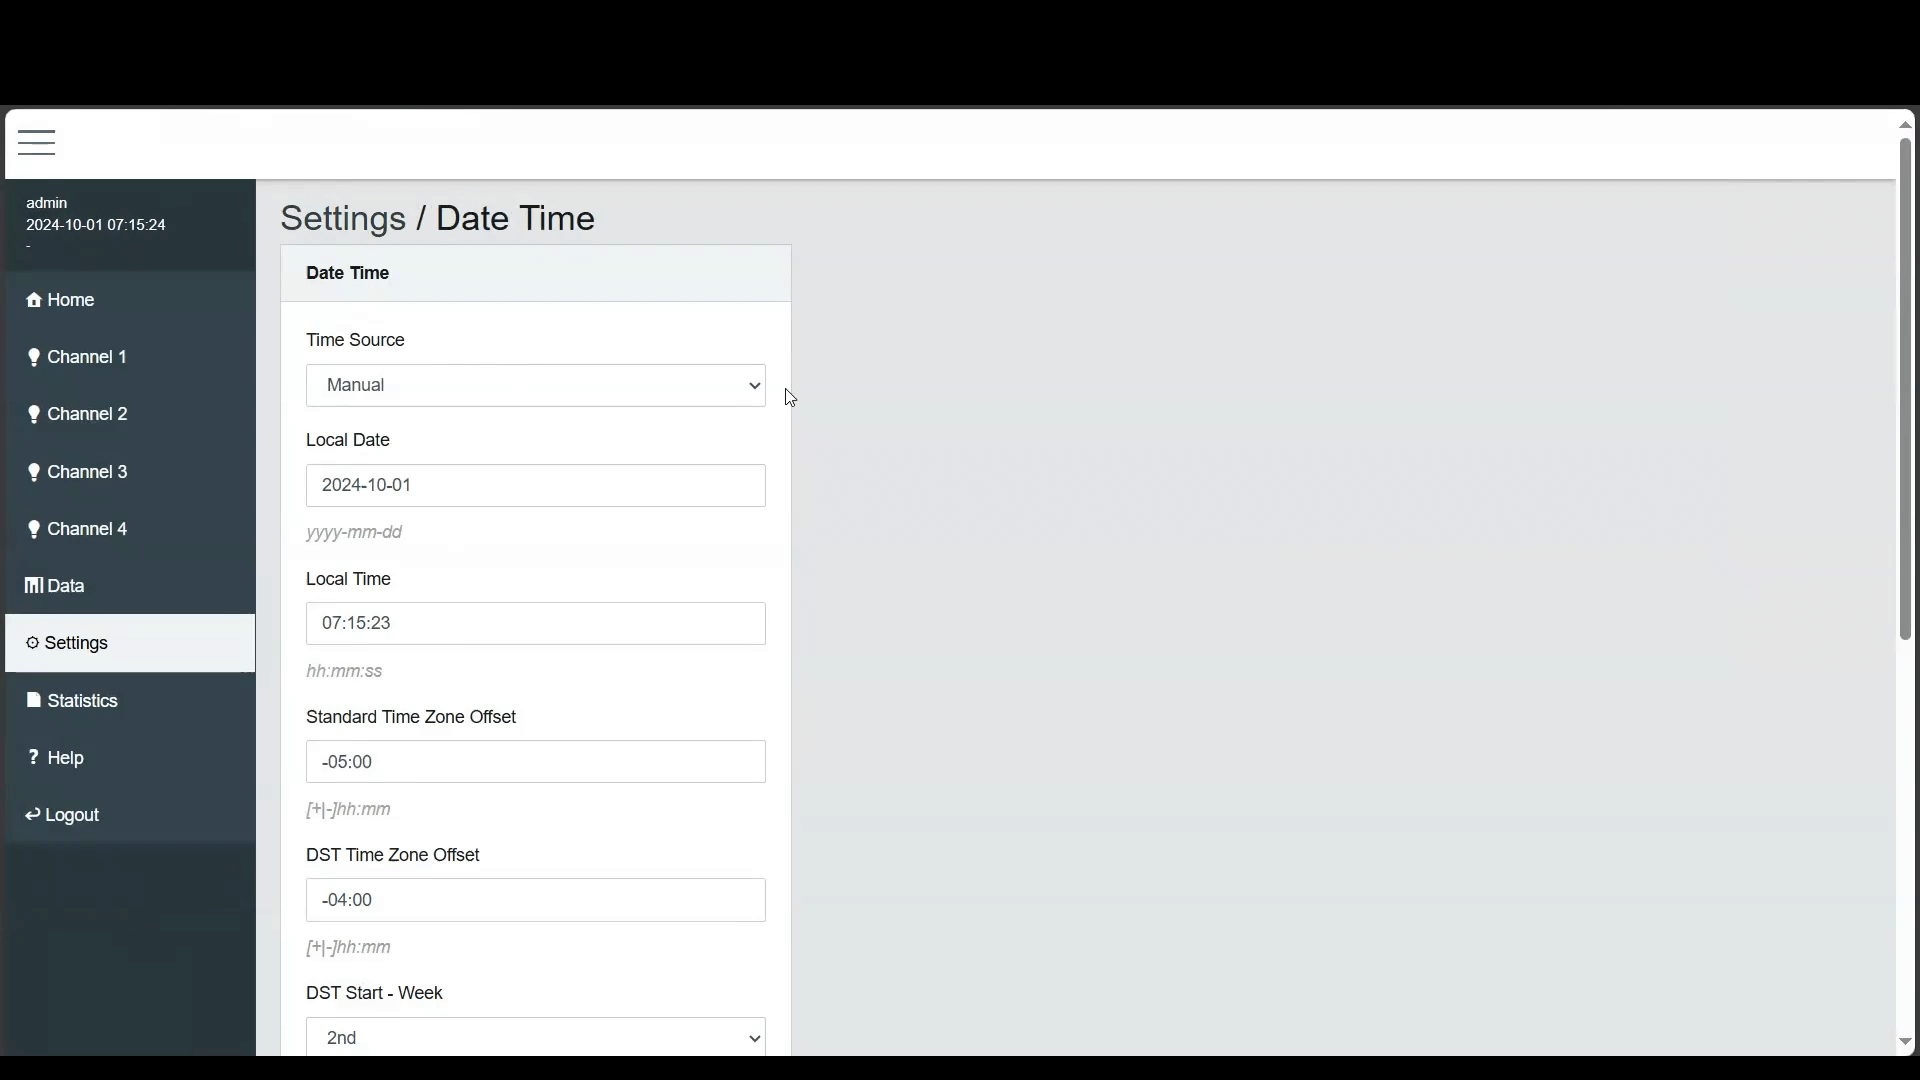
Ensure that the current time and daylight saving time (DST) settings are configured correctly. In the 'Date and Time' Settings, enter the current time and choose the appropriate DST start and end dates. It is recommended to reboot the system after modifying the system date and time to ensure all scheduled events execute correctly.
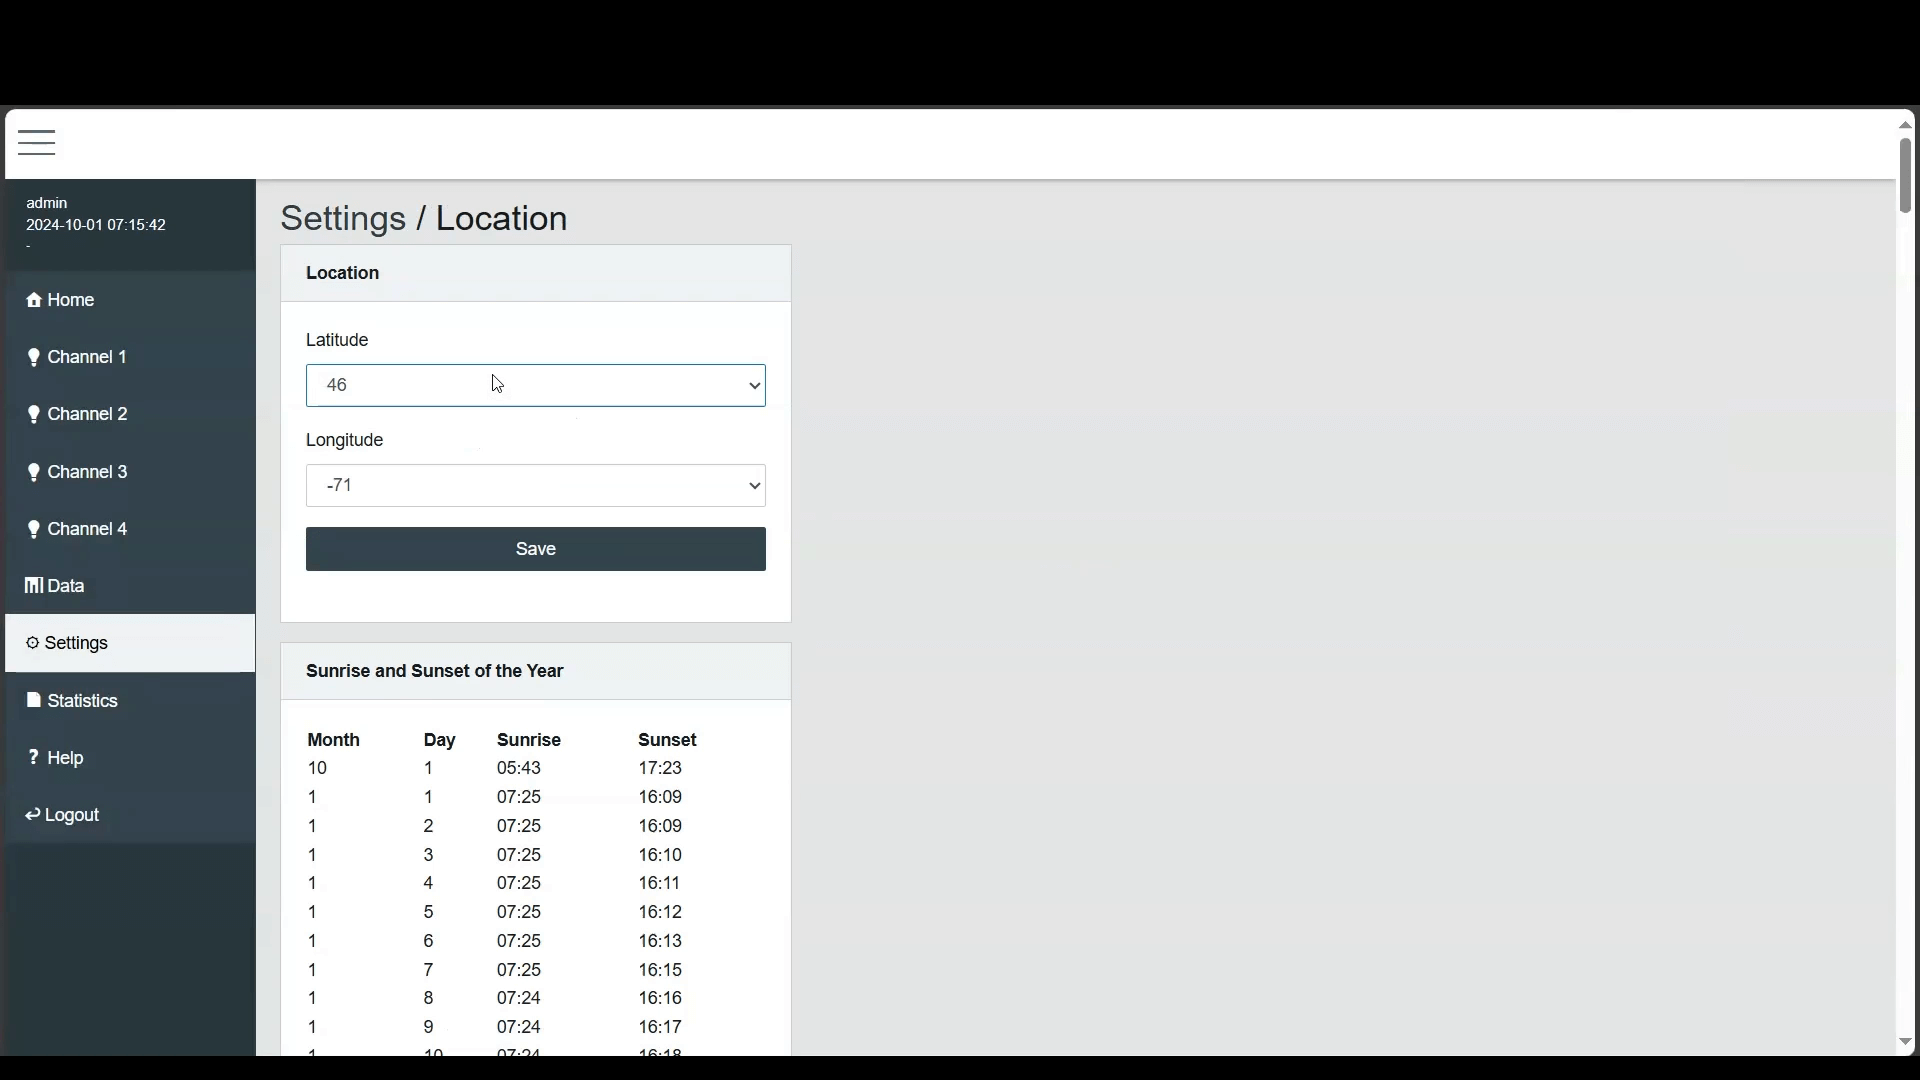
- To set up an astronomical schedule, we first need to configure the location. Go to the 'Location' settings and enter the building's latitude and longitude. These coordinates will help the system calculate sunrise and sunset times. The table at the bottom lists all the calculated sunrise and sunset times for the current year, based on the configured latitude and longitude. The first row displays the times for the current day.
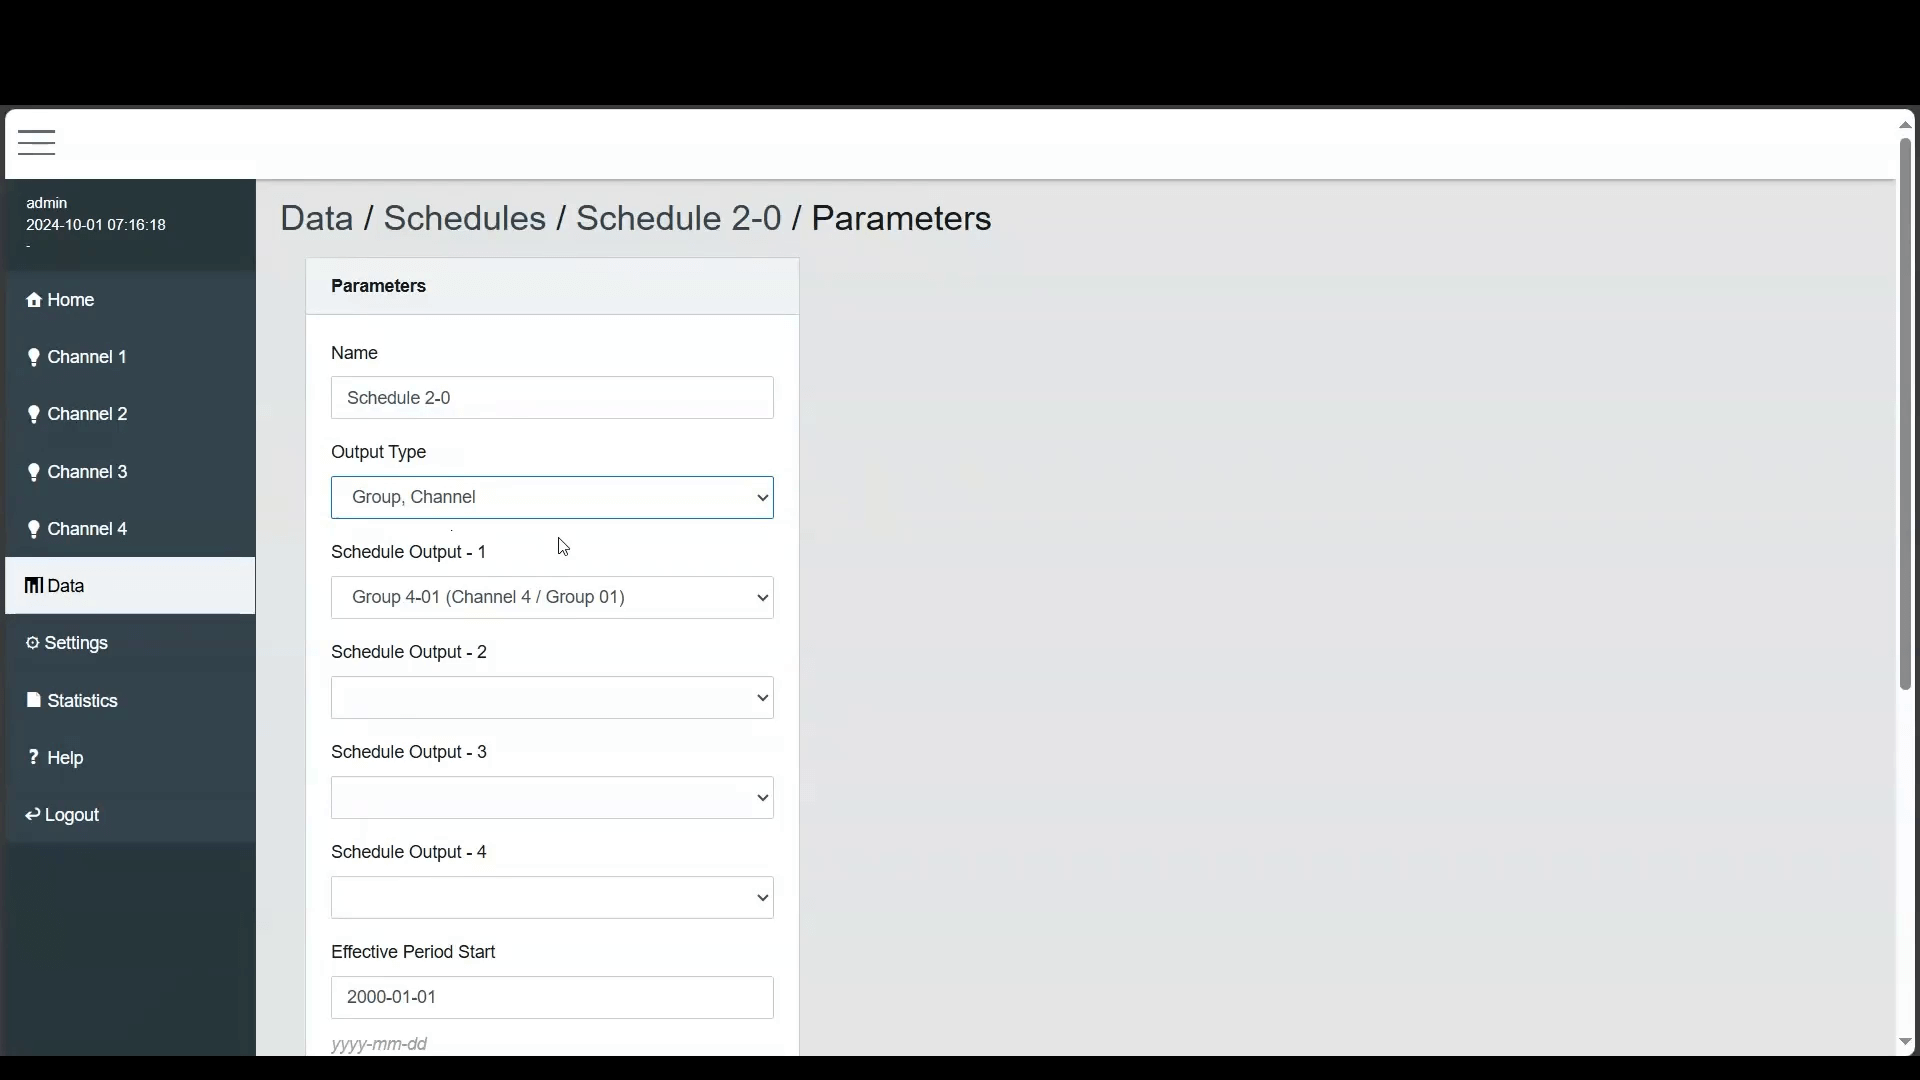
- Now navigate to the 'Schedules' section. Choose a schedule and navigate to the Parameters. Here, you'll find the Output Type setting, which allows you to specify the type of output the schedule will control. The options include:
- Group or Channel: This option allows the schedule to send commands to a specific group or channel.
- Commander: This option allows the schedule to control a single commander.
- Commanders: This option enables the schedule to control multiple commanders.
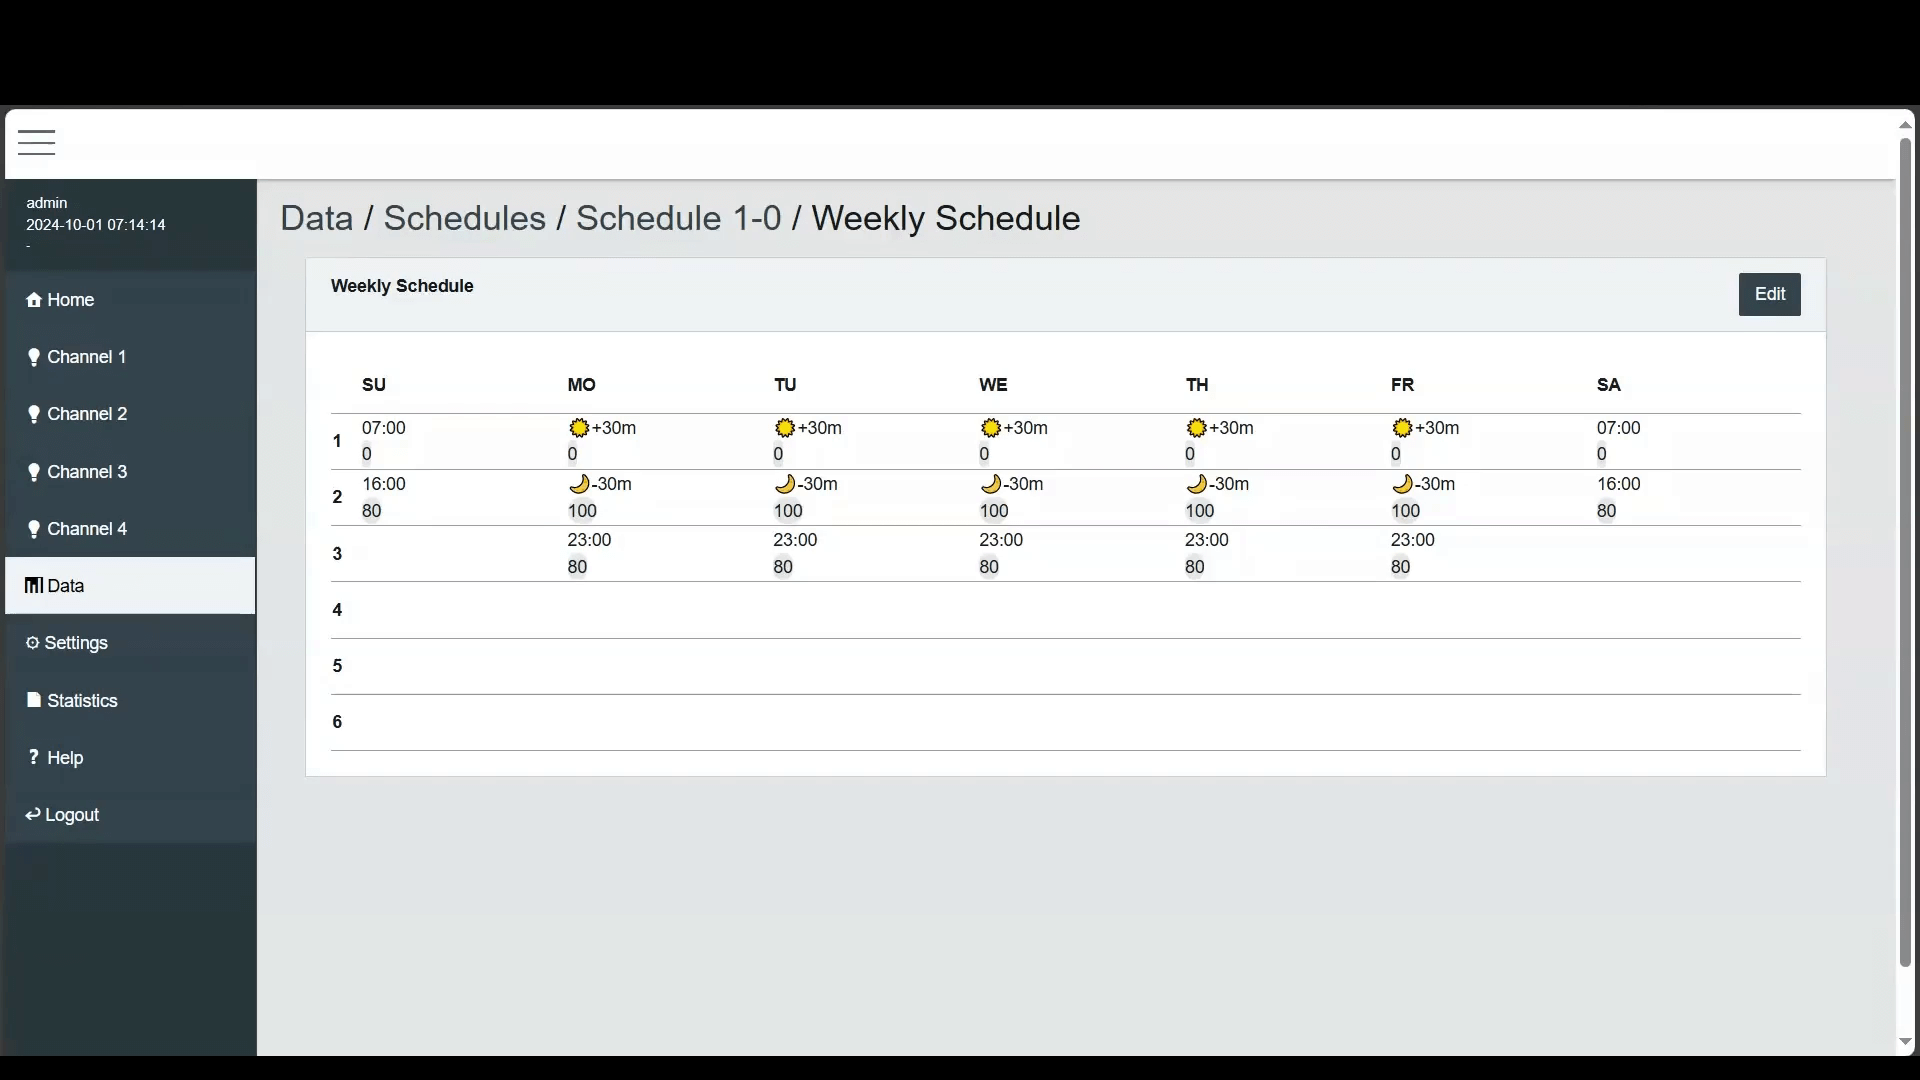
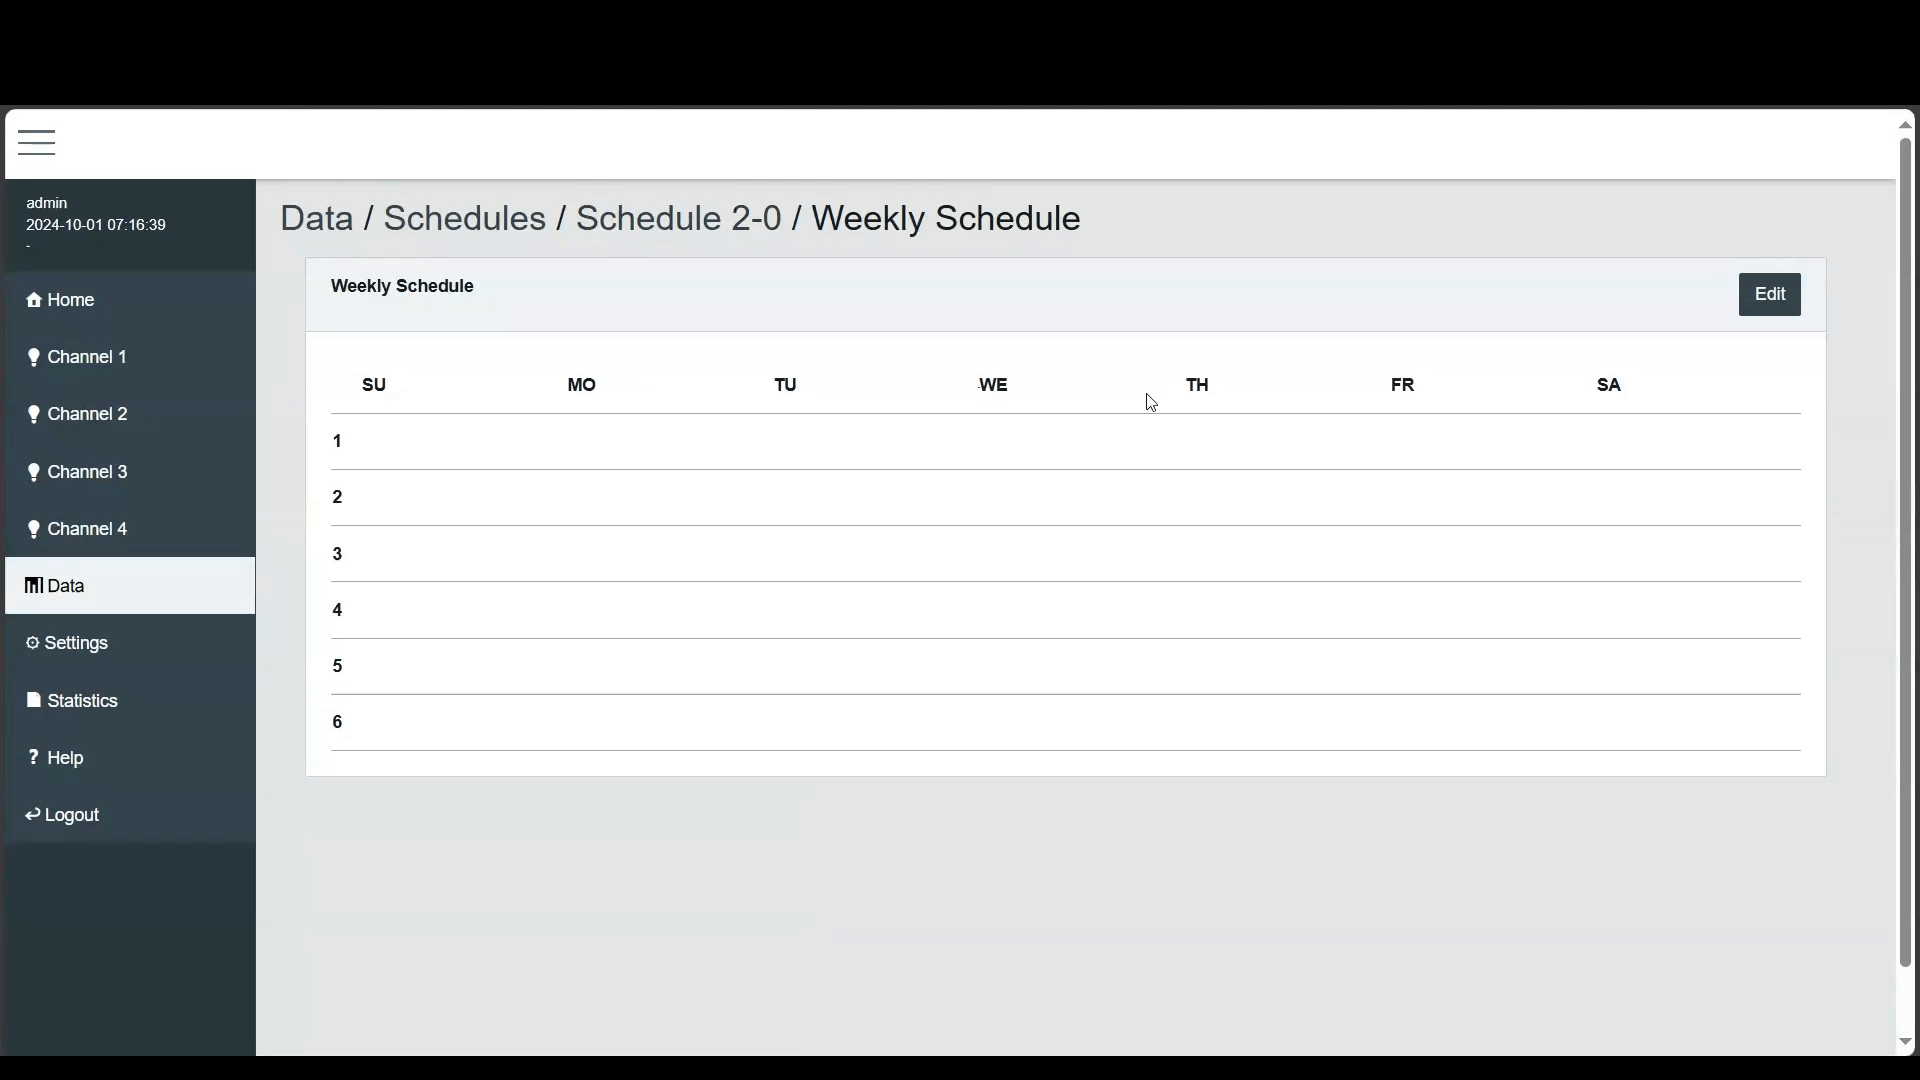
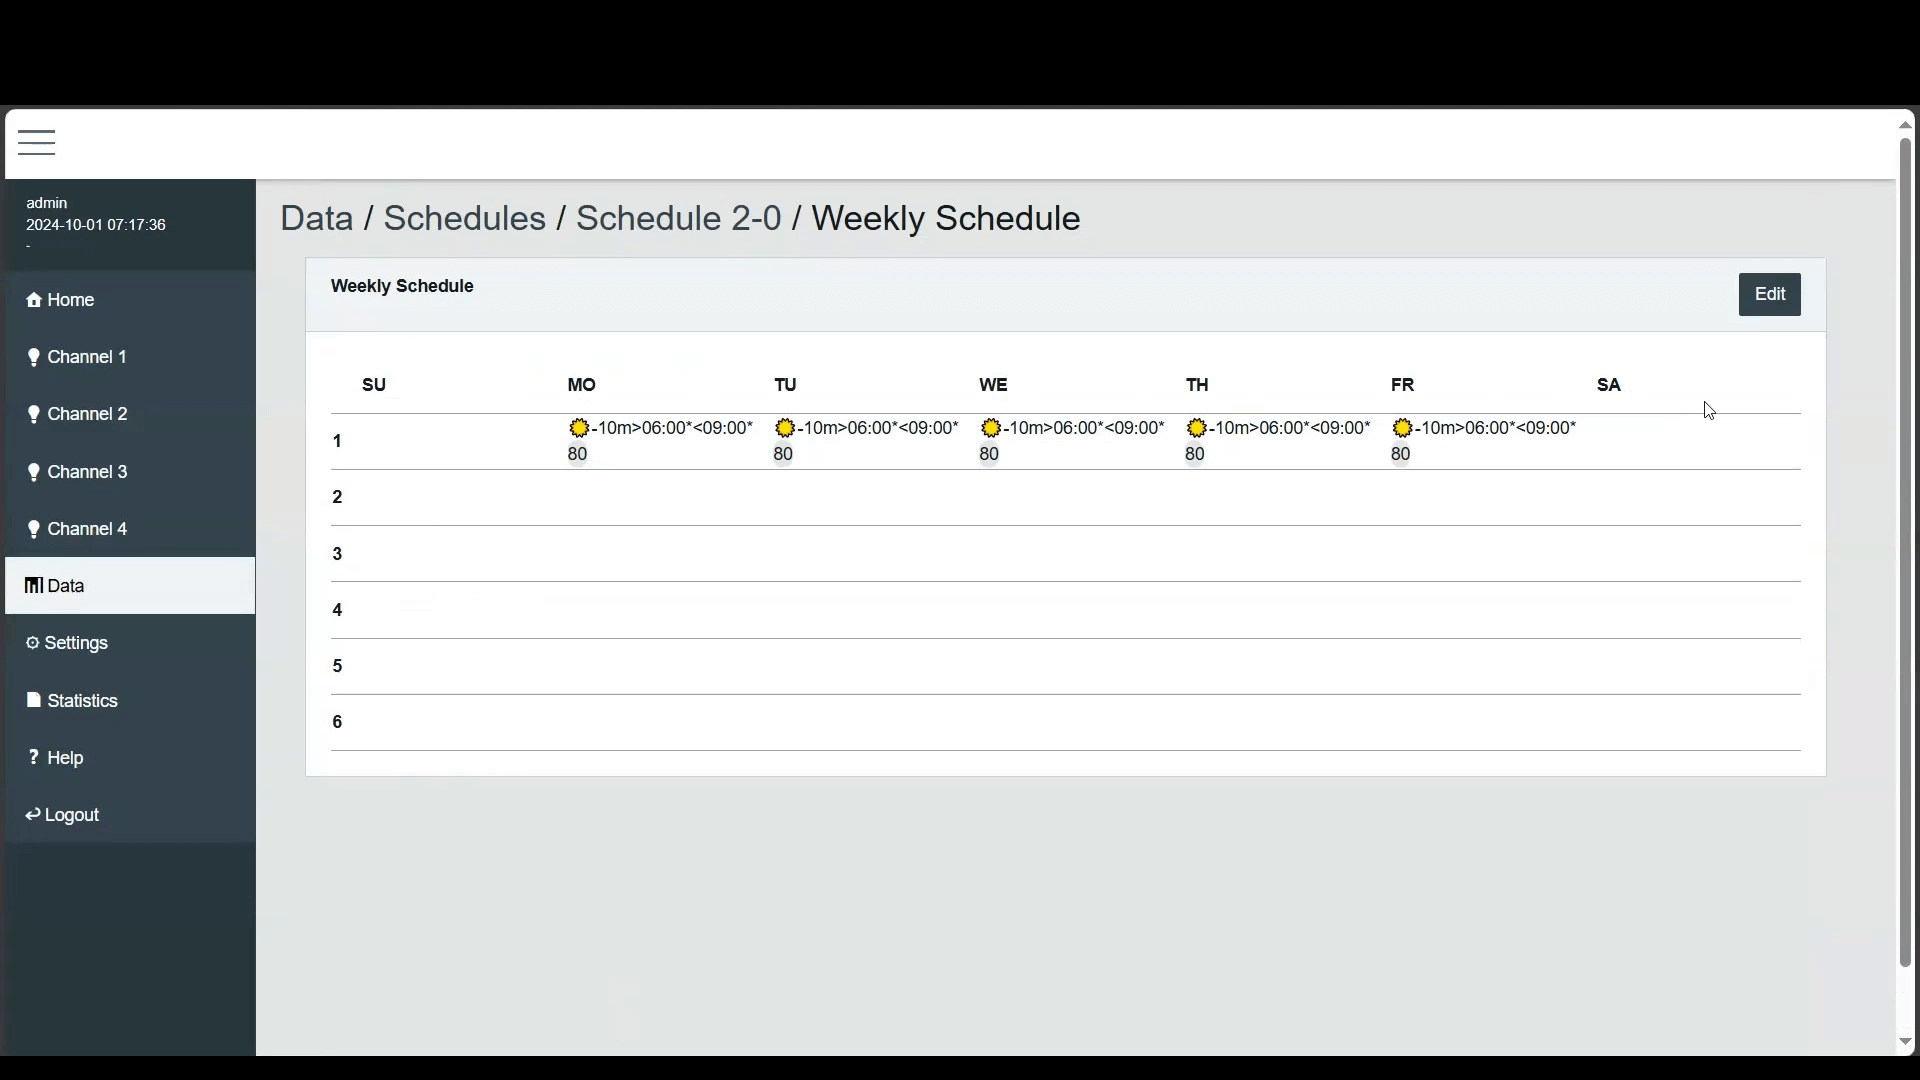
- Next, we'll create a standard weekly schedule. Navigate to the 'Weekly Schedule'. This page displays a summary of the configured events.
- In the 'Weekly Schedule Edit' section, you can modify the schedule's events. First, select the Day of the Week and Event Program number you want to edit, as multiple days can be edited simultaneously. Then, choose the type of event—whether it is a fixed time event or an astronomical event such as sunrise or sunset. You can also set an offset for astronomical events, specifying up to 120 minutes before or after the actual time. Additionally, you can set the earliest or latest time the event can occur and decide if the event should execute within these boundaries. Finally, you need to define the Value, which can be either the light intensity or scene to be executed at the specified time, or a Start or Stop command to be sent to a Commander.
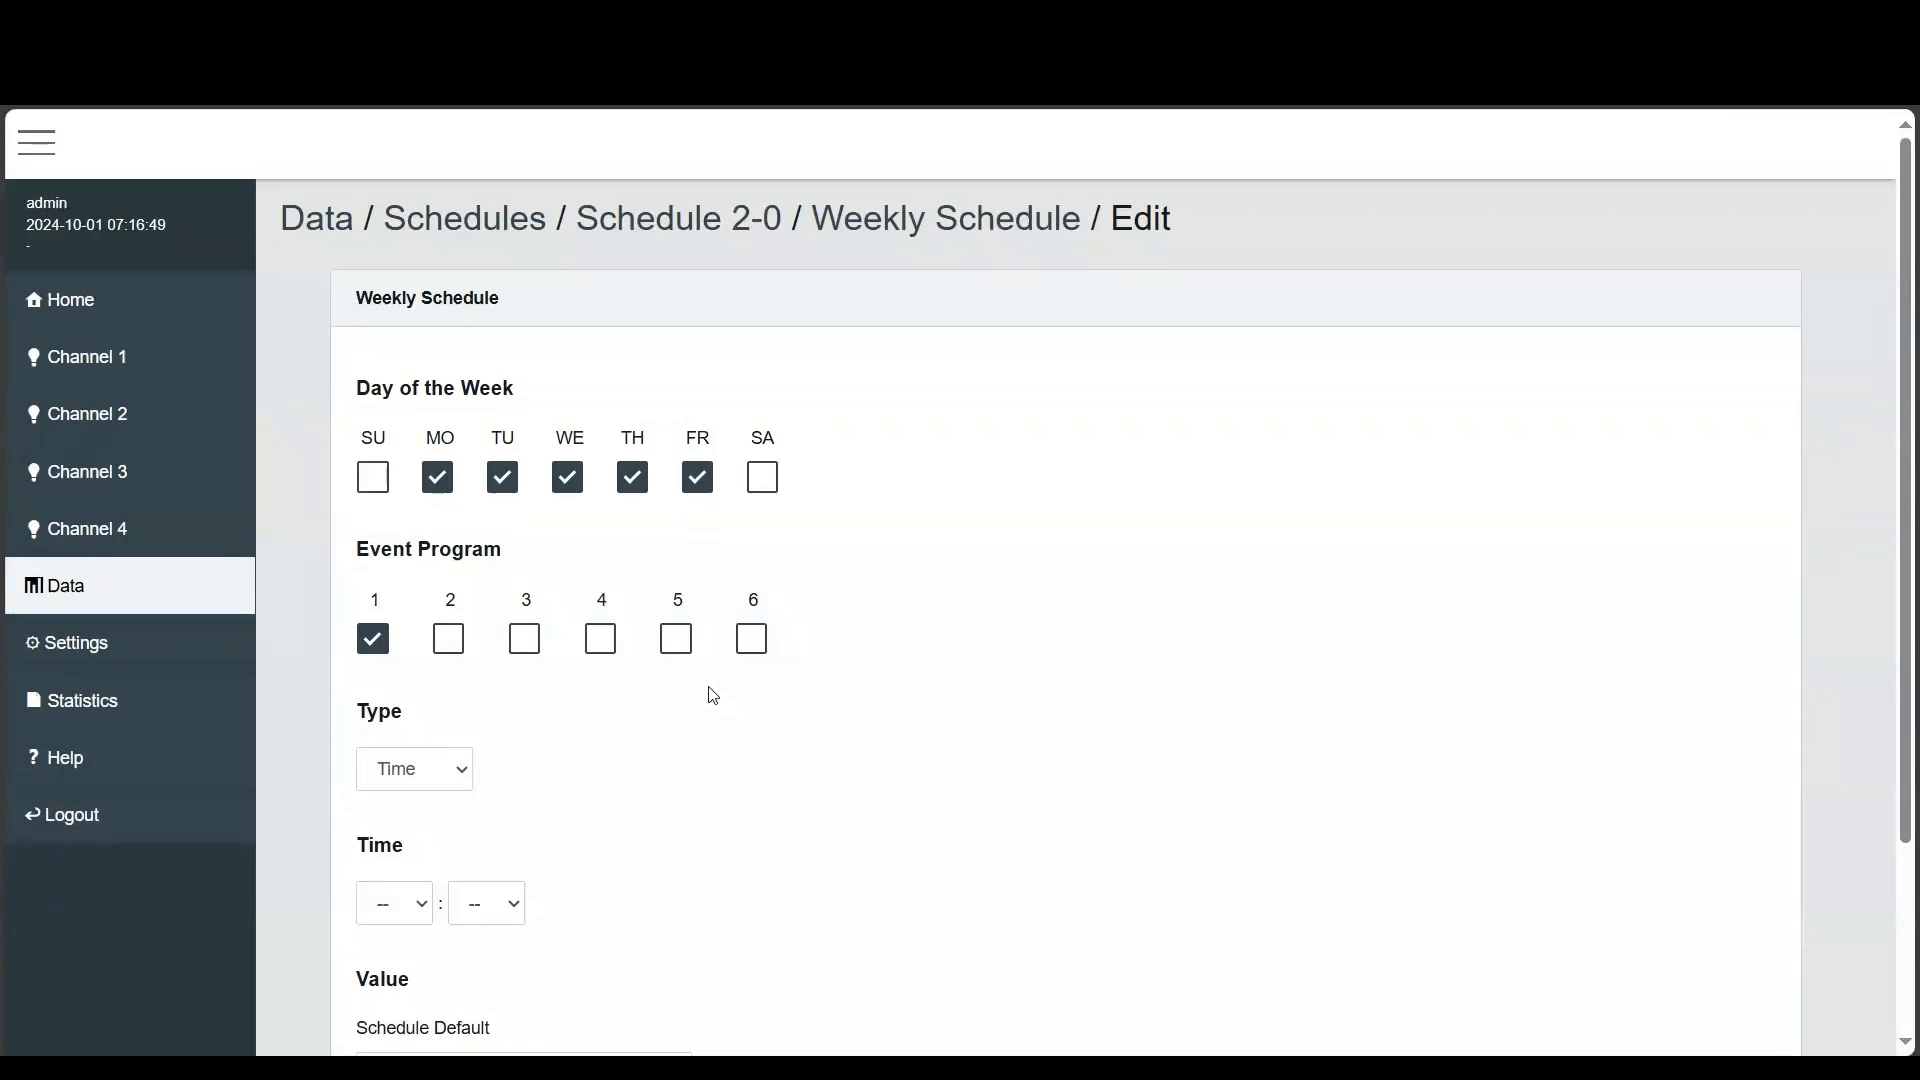
To delete an event, go to the 'Time' section and select '– : –'. This will delete all events corresponding to the selected Day of the Week and Event Program.
At the bottom of the page, you will find three buttons: Cancel, Ok, and Apply. The Cancel button will discard any changes and close the edit screen. The Ok button saves the changes you made and closes the screen, while the Apply button will save the changes without closing the screen, allowing you to continue editing.
The system will now automatically control the lighting based on your schedule and the astronomical time clock.
Conclusion
With these simple steps, you've successfully configured both standard and astronomical schedules, ensuring efficient lighting control.